Edit widget
In this topic
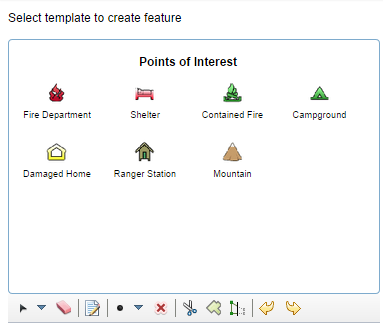
This widget provides editing capabilities using an editable layer in a feature service. It displays a gallery of templates from one or more feature layers. On the map, you can pick a symbol on the template to create a feature with the associated attribute inspector, or select an existing feature to update its geometry and attributes. If the feature layer supports attachments, the attribute inspector includes the ability to create, view, and delete attachments. Optionally, you can enable the toolbar for advanced feature editing.
Tip:
To use the Edit widget, you must have selected a map in the Map tab that has editable layers.
Configuring the Edit widget
- Click the edit icon
 to open the widget configuration window.
 - Check Toolbar Visible to display the editing toolbar. The editing toolbar allows you to select features, clear selection, and delete features (by selection).
- Check Merge, Cut, or Reshape to individually allow these geometry modifying operations via the editing toolbar.
- Check Enable Undo/Redo to enable the undo/redo capabilities of the edit widget. This allows you to revert and re-apply changes in order.
- Check Editable beside a layer to enable editing on that particular layer.
- If you want to disable updates to the feature's geometry, check Disable Update Geometry.

- Click the pencil button under Fields to select the fields that can be edited from the user interface.

- Click OK to close the dialog box and apply your changes.
Using the Edit widget
Open the Edit widget to display the template picker. If the layer you want to edit does not show in the template picker, make sure that Editable is checked for the layer in the configuration and the layer is visible on the map.
- To add a feature, click its symbol in the template, and click to add or draw it on the map.

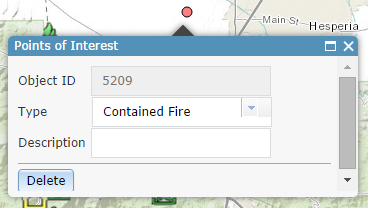
- Once you've added the feature, a pop-up appears.

- Enter information into the available fields. The fields vary, based on the editable attribute fields in the feature service and the configuration of the editable layer.
- To attach an image or other files with a feature (when available), click Browse in the Attachments section of the pop-up and choose the file from your computer.
- Once you've added the feature, a pop-up appears.
- To edit a feature, click it on the map to open its pop-up and edit the information.
- To remove a feature, click it on the map to open its pop-up and click Delete.
Optionally, you can use the toolbar to perform the feature editing.