Disponible con licencia de Location Referencing.
La alineación le permite crear entidades que se conectan entre sí de modo que sus ediciones sean más exactas, con menos errores. Al activar la alineación, el puntero salta, o se ajusta, con bordes vértices y otros elementos geométricos cuando está cerca de ellos y dentro de una determinada tolerancia. Esto le permite ubicar una entidad fácilmente con respecto a las ubicaciones de otras entidades.
The ArcGIS Event Editor provides the functionality of snapping to the line, point, and polygon features in the map. Snapping can be useful for the selection of routes, adding line and point events, and creating redlines.
- Open Event Editor and, if prompted, sign in to Portal for ArcGIS or ArcGIS Online.
- Click the Edit tab.
- In the Edit Events group, click the Snapping Options button
 .
.The Snapping Options dialog box appears.
- Enter the snapping tolerance.
The default snapping tolerance is set to 15 pixels.
La tolerancia de alineación es la distancia dentro de la cual se alinea el puntero o una entidad con otra ubicación. Si el elemento con el que se va a alinear, por ejemplo un vértice o un borde, está dentro de la distancia establecida, el puntero se alineará automáticamente con la ubicación. Establece el valor de tolerancia de alineación en píxeles por defecto.
- Choose one of the layers to snap to from the list of layers available on the map.
Nota:
You can configure Event Editor to support snapping to more than one layer. If your instance supports snapping to more than one layer, check the box next to each layer to which you want to snap. Enabling snapping on multiple layers can impact the performance of your Event Editor instance. - Check one or more snap types from vertex, edge, and end snap types.
- Vertex snapping—The input will be snapped to feature vertices.
- Edge snapping—The input will be snapped to feature edges.
- End Snapping—The input will be snapped to feature end points.
- Click OK.
The snapping options are now set up.
- To start snapping, click the Enable Snapping button
 .
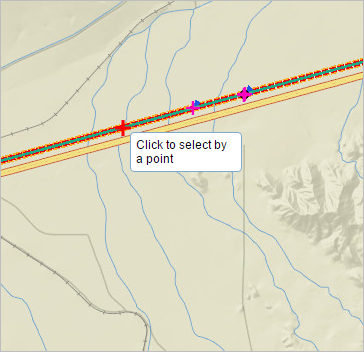
.Now, when you move your pointer around the map while using a tool, such as selection of routes, adding line and point events, creating redlines, and so on, the pointer will snap to various geometric locations (shown with a red cross) as you move over them.
