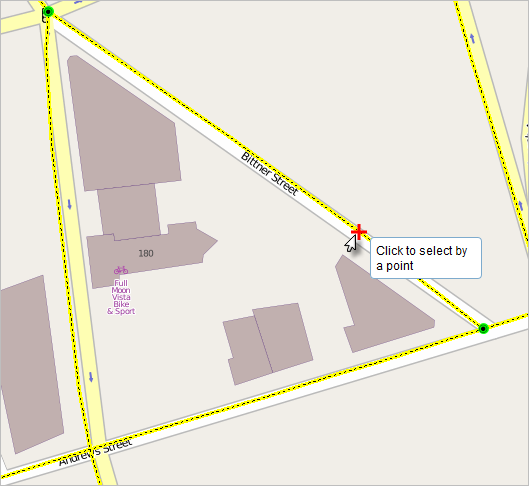
La capture vous permet de créer des entités qui se connectent les unes aux autres afin que vos modifications soient plus précises et présentent moins d'erreurs. Lorsque la capture est activée, le pointeur se positionne, ou s'aligne, sur les tronçons, les sommets et d'autres éléments géométriques situés à proximité du pointeur et dans une certaine tolérance. Cela vous permet de positionner facilement une entité par rapport aux emplacements d'autres entités.
The Event Editor provides the functionality of snapping to the line, point, and polygon features in the map. Snapping can be useful for the selection of routes, adding line and point events, and creating redlines.
- Ouvrez Event Editor et, si vous y êtes invité, connectez-vous à Portal for ArcGIS ou ArcGIS Online.
- Cliquez sur l’onglet Mise à jour.
- In the Edit Events group, click the Snapping Options button
 .
.The Snapping Options dialog box appears.
- Enter the snapping tolerance.
The default snapping tolerance is set to 15 pixels.
La tolérance de capture représente la distance en fonction de laquelle le pointeur ou une entité est capturé(e) sur un autre emplacement. Si l'élément capturé (sommet ou tronçon) se trouve à l'intérieur de l'intervalle que vous avez défini, le pointeur est capturé (se place) automatiquement sur cet emplacement. Vous définissez la valeur de tolérance de capture par défaut en pixels.
- Choose one of the layers to snap to from the list of layers available on the map.
Remarque :
You can configure Event Editor to support snapping to more than one layer. If your instance supports snapping to more than one layer, check the box next to each layer to which you want to snap. Enabling snapping on multiple layers can impact the performance of your Event Editor instance. - Check one or more snap types from vertex, edge, and end snap types.
- Vertex snapping—The input will be snapped to feature vertices.
- Edge snapping—The input will be snapped to feature edges.
- End Snapping—The input will be snapped to feature end points.
- Click OK.
The snapping options are now set up.
- To start snapping, click the Enable Snapping button
 .
.Now, when you move your pointer around the map while using a tool, such as selection of routes, adding line and point events, creating redlines, and so on, the pointer will snap to various geometric locations (shown with a red cross) as you move over them.

Vous avez un commentaire à formuler concernant cette rubrique ?