Attribute sets are a collection of linear event layer columns that can be edited as a logic group. The configuration of attribute sets provides flexibility to divide your event editing workflows by responsible party and/or by the way data is collected and referenced.
For example, your pavement type, number of lanes, and median information may be collected from printed engineering drawings and referenced by engineering station measures. In this case, you could configure an attribute set for pavement type, number of lanes, and medians with the default location method as stationing. When you use the Add Linear Event widget to add data from an attribute set, the dialog box will be autoconfigured with the designated settings for measures and columns to edit, streamlining your workflow.
In contrast, you may collect functional class, ownership, and speed limit from an Excel file provided from a different group, where the data provided is located by route and mile point measure. You could create another attribute set for functional class, ownership, and speed limit with the default location method as your mile point network.
You may want to have different attribute sets to separate event layers to delegate editing responsibility between users or business units. You can create an attribute set for characteristic data such as access control, terrain type, or grade for that user or the group of users who edit that data. You can create a separate attribute set for event layers that represent pavement characteristics for the user or set of users who edit that data.
Attribute sets are used to create a set or group of event column fields, from one or more event layers, that you can use to add records in the Add Linear Events widget in Event Editor. Each editable field within an event layer is present in the Available Event Layers list, which can be added to a group in the right pane. In addition, some default configurations for the attribute set can be provided, such as the default from measure method, from unit of measure, to measure method, and to units of measure, that drive measure settings in the Add Linear Events widget. Show layer names setting will drive the layer name visibility in the Add Linear Events widget. The administrator can provide preconfigured attribute sets, or you can create your own attribute set using the steps outlined below.
For more information, see Producing attribute sets and Adding linear events by route and measure.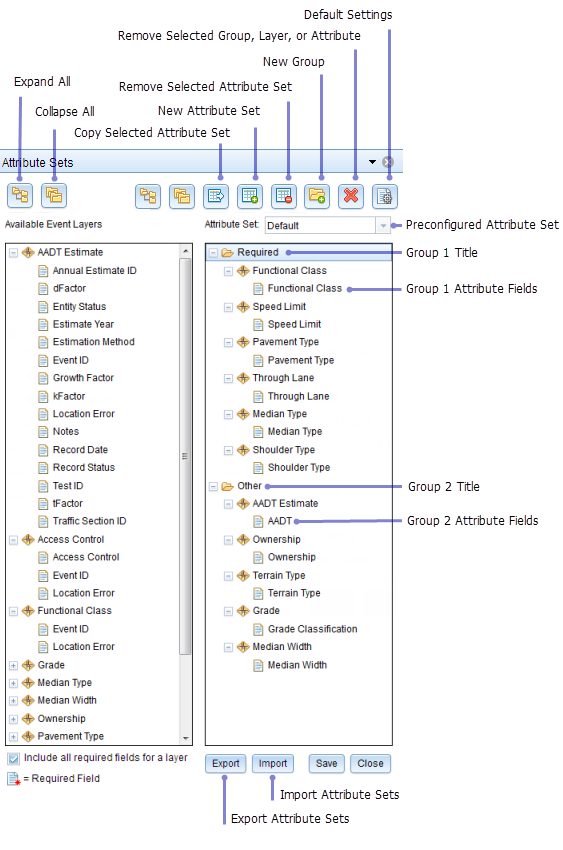
 | Expand All | Shows all the attribute fields present within each event layer. |
 | Collapse All | Hides the attribute fields to show only the event layers. |
 | Copy Selected Attribute Set | Copies all the attribute fields present in an event from the left panel to the attribute group in the right panel. The copy is made permanent only when you click the Save button. |
 | New Attribute Set | Creates a new attribute set. The attribute sets created by using this button are saved in the browser. Therefore, these attribute sets are available only to the user's browser. |
 | Remove Selected Attribute Set | Removes the selected attribute set from the widget. The administrator-configured attribute sets cannot be removed using this button. |
 | New Group | Creates a new group in the right panel. A group contains event attribute fields. An attribute set is made up of one or more groups. The group is saved permanently by clicking the Save button. |
 | Remove Selected Group, Layer, or Attribute | Removes a selected group, layer, or attribute from the right panel. The removal is made permanent by clicking the Save button. |
 | Default Settings | Allows configuration of default settings for attribute sets. These settings include the default network, from method, from measure units, to method, and to measure units for the Add Linear Events widget. |
Modify a preconfigured attribute set
A new attribute set can be created by modifying a preconfigured one.
You can access a preconfigured attribute set and create new attribute sets by opening a web browser and browsing to Event Editor.
- Click the Edit tab.
- In the Edit Events group, click the Modify Attribute Sets button
 .
.The Attribute Sets dialog box appears.
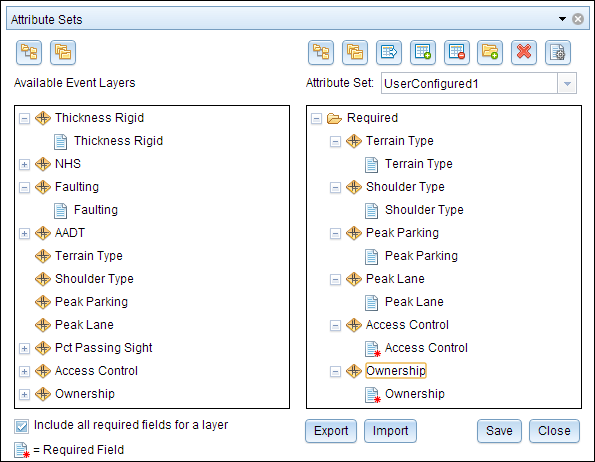
The current attribute set will appear in the window.
- To create a new attribute set, click the New Attribute Set button
 .The Default Settings dialog box appears.
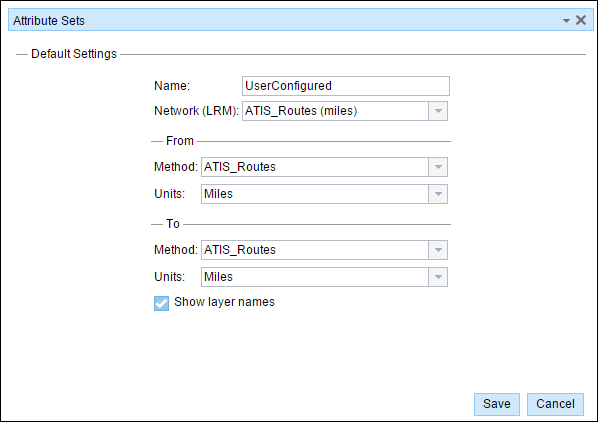
- Select the default Network, From Method, From Units, To Method, To Units, and Show layer names and click Save.
The Attribute Sets dialog box appears.
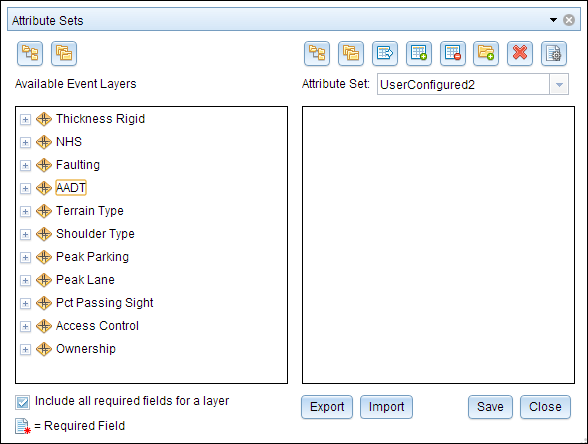
注意:
To make changes to the default settings once they've been saved, click the Default Settings button
 and change the settings.
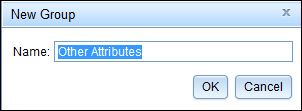
 - Click the New Group button
 and type the name of a group.
This group will be part of the new attribute set.
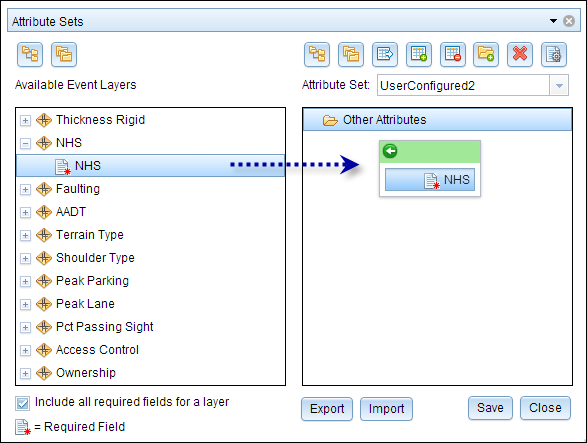
- From the Available Event Layers list, drag a required event field to the group on the right.
- Add more event fields to the group.
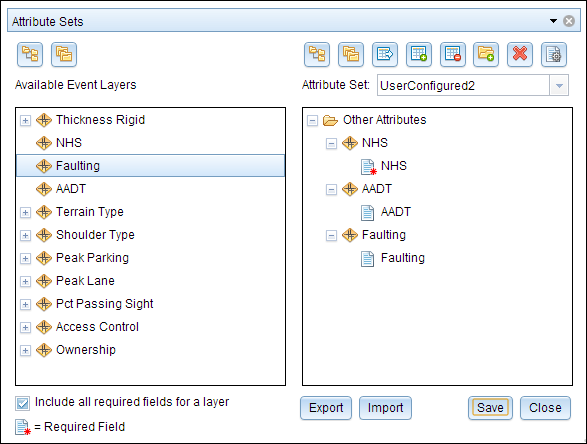
- When you're finished adding attributes to the attribute set, click Save.
You can create a copy of existing attribute sets by clicking the Copy Selected Attribute Set button
 .
. - Click Close.
Now the current attribute set is UserConfigured2. You can also select the preconfigured attribute set (named Default) from the Attribute Set drop-down list in the upper right.
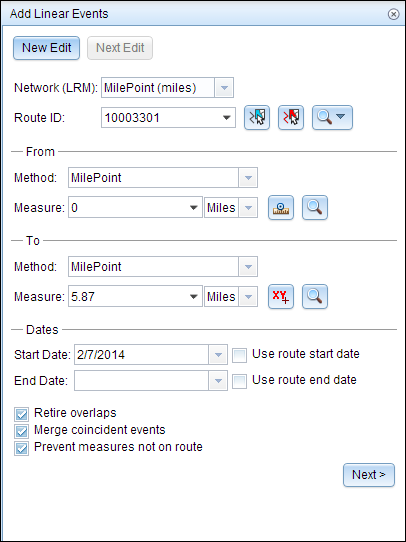
- On the Edit ribbon, in the Edit Events group, click Add Linear Events.
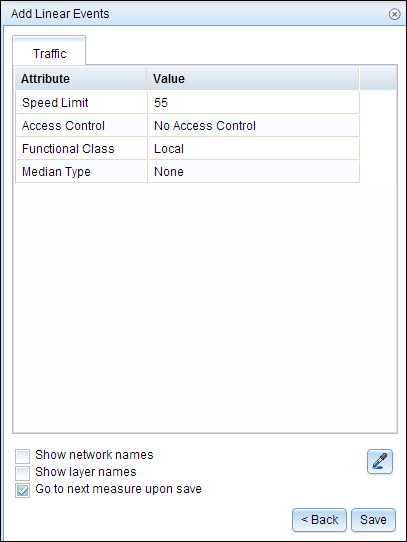
The UserConfigured2 attribute set default settings and attributes appear and can now be used to add linear events using the widget. For more information about the Add Linear Events widget, see Adding linear events by route and measure.
 symbol. A required field is a nonnullable field with no default value.
Import attribute sets
Alternatively, you can import attribute sets shared with you by other users by using the steps outlined below.
- Open a web browser and browse to Event Editor. On the Edit tab, in the Edit Events group, click the Modify Attribute Sets button.
- Click Import and browse to the location of your Esri Roads and Highways attribute set (.rhas) file.
- Click Open to import your file.
To learn more about exporting a (.rhas) file, see Producing attribute sets.
The imported attribute set will be loaded into the Attribute Sets dialog box. You can modify the attribute set by following the steps outlined above.
- When you're ready to save, click Save.