To generate reports using Roadway Reporter, you must first publish the Generate Report tool as a geoprocessing service. To publish as a geoprocessing service, you must author a geoprocessing task using the Generate Report geoprocessing tool. Follow the instructions listed to deploy the Generate Report geoprocessing tool.
備考:
The Generate Report tool is part of the Roadway Reporter installation. If ArcGIS Desktop and Roadway Reporter web server are present on separate machines, you must copy the entire Tools folder from the Roadway Reporter machine to the ArcGIS Desktop machine to publish the tool.
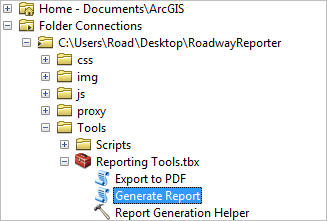
- In ArcCatalog, create a folder connection to the Roadway Reporter tools folder.
The Tools folder is located in the Roadway Reporter web folder, which can be found in <Installation location>\ArcGIS\LocationReferencing\Server<Server Version>\Web\RoadsandHighways\RoadwayReporter.
- Open the .mxd file that you created in step 2 of the deployment.
This map contains all the network, events, and intersection layers that you need for reporting.
備考:
The network, events, and intersection layers in this .mxd should be the same layers used for publishing your map service in step 4 of the deployment.
- Double-click the Generate Report tool.
- Click the browse button
 next to LRS Workspace and browse to the workspace.
The enterprise geodatabase file contains the reporting data.
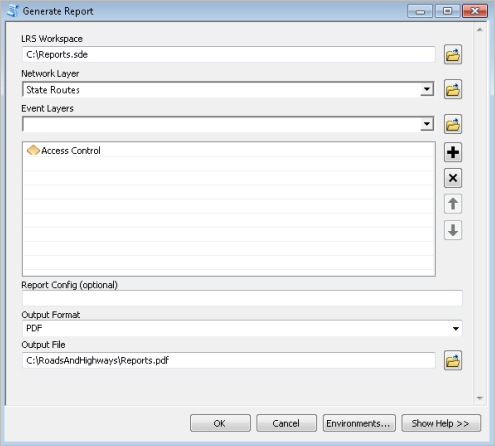
Running the Generate Report tool - Click the Network Layer drop-down arrow and choose at least one network layer in the LRS for which you plan to create a report.
- Click the Event Layers drop-down arrow and choose at least one event layer in the LRS for which you plan to create a report.
- Specify the output format.
By default, the output will be saved as a PDF. The other option is CSV format. This configuration can be changed once the service is deployed to Roadway Reporter.
- Specify the name and location of the output file.
The name assigned to the output will be the default name of the report generated through the Roadway Reporter web app.
- [OK] をクリックします。
- Browse to the geoprocessing Results window to publish the service once you have successfully run the Generate Report geoprocessing tool.
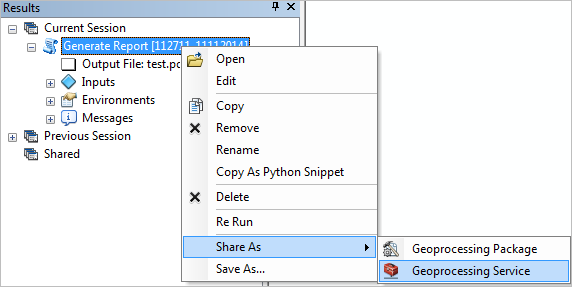
- Right-click the results for Generate Report and click Share As > Geoprocessing Service.
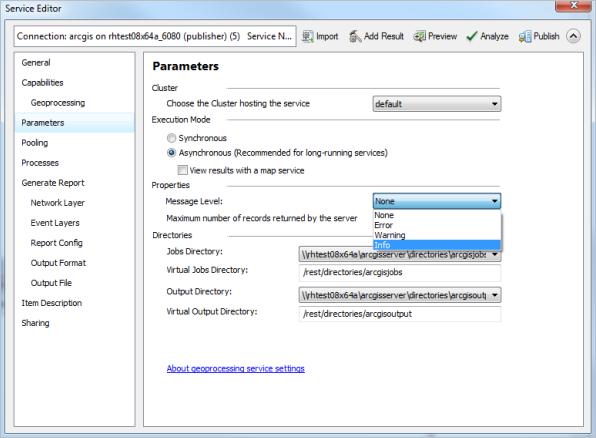
- Click the Parameters pane.
- Under Properties, set the Message Level to Info.
This ensures that all tool warnings and errors are returned.
- Click the Pooling pane.
- Specify the number of instances per machine to optimize performance.
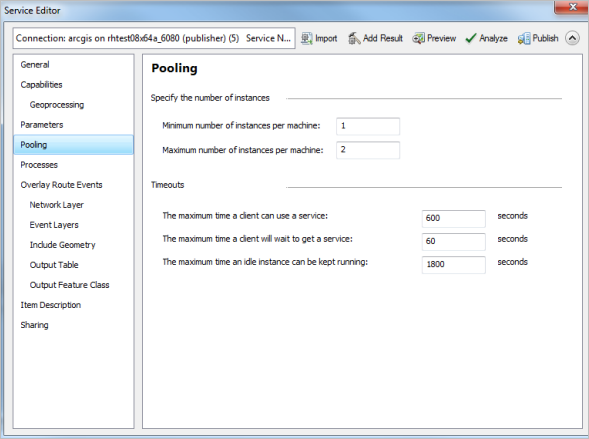
- Minimum number of instances per machine—Minimum number of simultaneous active users allowed.
- Maximum number of instances per machine—Maximum number of simultaneous active users allowed.
- Specify the Generate Report timeout service values to keep your service working and available.
- The maximum time a client can use a service—Specifies usage time, which is the amount of time between when a client receives a reference to a service and when it releases it. By default, this value is set to 600 seconds (10 minutes).
- The maximum time a client will wait to get a service—Specifies the wait time, which is the amount of time it takes between a client requesting a service and receiving a service before timeout. By default, this value is set to 60 seconds (1 minute).
- The maximum time an idle instance can be kept running—Specifies the amount of time the service will continue to run on the server until the running service timeout. By default, this value is set to 1800 seconds (30 minutes).
備考:
This value should be set to the amount of time required to generate your largest report. If the amount of time it takes to generate the report exceeds this value, the Generate Report service will timeout before the report is generated.
- Click Analyze to view any errors or messages.
- The following warning is returned: Data source used by Script Generate Report is not registered with the server and will be copied to the server. Ignore this Generate Report script warning.
- Fix any other errors or warnings.
- Click Publish.
The Copying Data to Server dialog box appears.
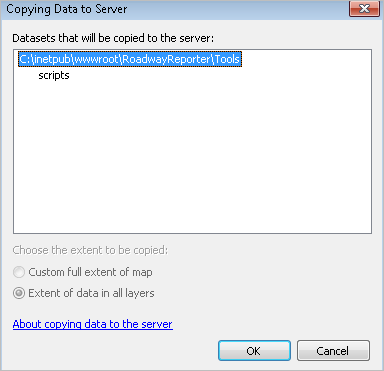
- Click OK.
The Generate Report script is copied to the server.
The Generate Report geoprocessing service is published to ArcGIS Server.
External Events
If you have external events present in the .mxd file, do the following additional steps:
- Note down the name of the external event from the Table Of Contents (TOC) window.
- Remove the external event from the TOC.
- Add the external event table to the MXD from its original location.
- Make sure that the external event table is named exactly same as the one you noted down in step 1.
- Follow the same procedure for all the external events present in the MXD.
- Save the MXD with a different name.
