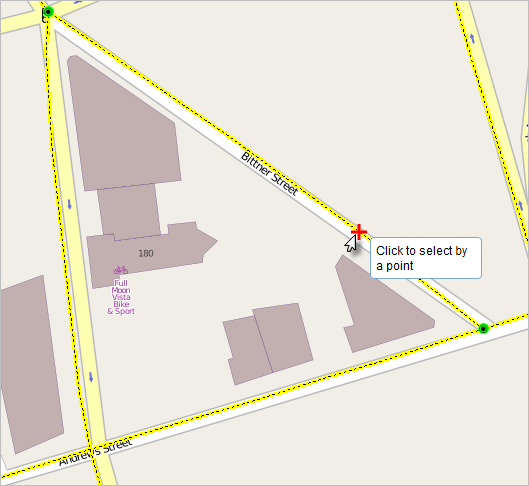
[スナップ] を使用して、相互接続するフィーチャを作成することにより、編集時のエラーが減り、編集内容が正確になります。スナップが有効な状態で、ポインターをエッジ、頂点、およびその他のジオメトリック エレメントの近くに移動して所定の許容範囲内に収めると、ポインターがジャンプまたはスナップします。これによって、他のフィーチャの位置を基準にして、簡単にフィーチャを配置することができます。
The ArcGIS Event Editor provides the functionality of snapping to the line, point, and polygon features in the map. Snapping can be useful for the selection of routes, adding line and point events, and creating redlines.
- Open Event Editor and, if prompted, sign in to Portal for ArcGIS or ArcGIS Online.
- Click the Edit tab.
- In the Edit Events group, click the Snapping Options button
 .
.The Snapping Options dialog box appears.
- Enter the snapping tolerance.
The default snapping tolerance is set to 15 pixels.
スナップ許容値とは、ポインターまたはフィーチャが別の位置にスナップする距離のことです。スナップ先のエレメント (頂点やエッジなど) が設定した距離の範囲内にある場合、ポインターは自動的にその位置にスナップ (ジャンプ) します。デフォルトのスナップ許容値はピクセル単位で設定します。
- Choose one of the layers to snap to from the list of layers available on the map.
注意:
You can configure Event Editor to support snapping to more than one layer. If your instance supports snapping to more than one layer, check the box next to each layer to which you want to snap. Enabling snapping on multiple layers can impact the performance of your Event Editor instance. - Check one or more snap types from vertex, edge, and end snap types.
- Vertex snapping—The input will be snapped to feature vertices.
- Edge snapping—The input will be snapped to feature edges.
- End Snapping—The input will be snapped to feature end points.
- Click OK.
The snapping options are now set up.
- To start snapping, click the Enable Snapping button
 .
.Now, when you move your pointer around the map while using a tool, such as selection of routes, adding line and point events, creating redlines, and so on, the pointer will snap to various geometric locations (shown with a red cross) as you move over them.
