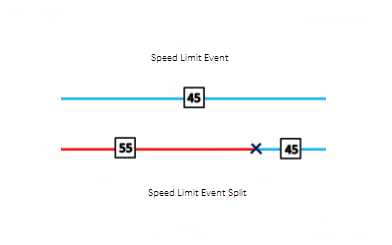
The Split Events tool is used to split a line event into two adjoining events. You can edit the attributes of the split events before selecting the location to split. On successful implementation, the resulting split events get new event IDs, and the input event retires.

Примечание:
If a line event that uses the referent offsets method to get the start and end measure values is split into two adjoining events, the resulting split events get new event IDs, and the original event retires. The first event will retain the referent offset method value for the start measure value, but will use the route and measure method to get the new end measure value. The second event will use the route and measure method to get the start measure value and will use the referent offset method value as its end measure value.
- Откройте Event Editor, и, если необходимо, выполните вход для учетной записи организации ArcGIS.
- Щелкните вкладку Редактировать.
- In the Edit Events group, click the Split Events button
 .
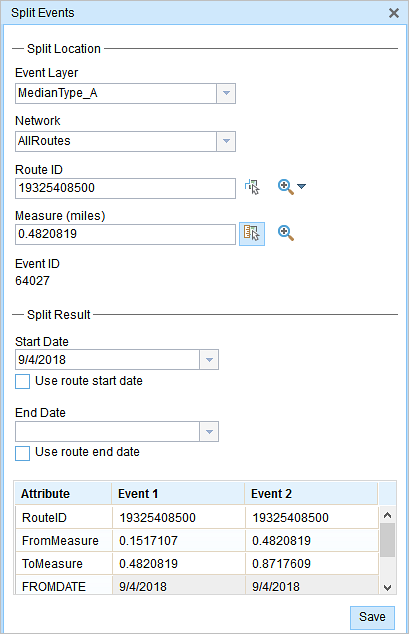
.The Split Events widget appears.
- In the Split Location section, choose an event layer on which to work by clicking the Event Layer drop-down arrow.

- The LRM to which the event is registered is automatically specified under the Network option, but you can choose the LRM by clicking the drop-down arrow.
- Type a route ID in the Route ID text box on which the new event measure will be based.
- Click the Select From Measure on the Map button
 to select a point on an event from the selected route.
The event will be split into two events on either side of the point. Alternatively, you can type a measure value in the text box. The event underlying the measure value of the route will be split into two.
The records/attributes of the split event appear in the Split Result area.
- Щелкните опции управления календарем Дата начала и Дата окончания, чтобы выбрать даты начала и окончания события.
По умолчанию датой начала является текущая дата, но вы можете выбрать другую. Дата окончания является необязательным параметром.
- Вы можете редактировать поля белого цвета.
The gray fields are disabled and not editable.
Примечание:
Домены кодированных значений, домены диапазонов и подтипы поддерживаются при настройке любого поля в таблице Attribute-Value.
- Click Save to split the records.
После сохранения измененного события в нижнем правом углу появится подтверждение.
Подсказка:
Также вы можете щелкнуть кнопку Выбрать маршрут на карте  .
.