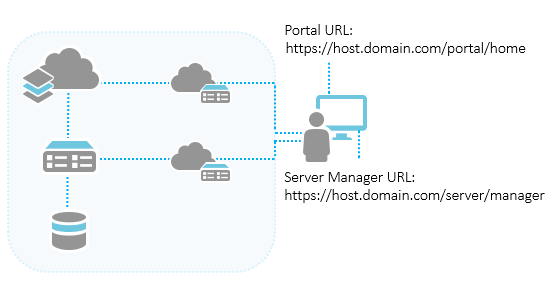
Once ArcGIS Enterprise Builder completes the installation of the software, a browser opens and presents the ArcGIS Enterprise configuration wizard. If you have not yet installed the software using the ArcGIS Enterprise Builder, see Installing with ArcGIS Enterprise Builder for detailed steps before proceeding.
Use the configuration wizard
Once you've installed the software with ArcGIS Enterprise Builder, perform the following steps with the configuration wizard to complete your base deployment:
- If it's not already open, browse to the configuration wizard's URL (https://mymachine.mydomain.com:6443/arcgis/enterprise). You can also search your machine for the ArcGIS Enterprise Configuration Wizard and launch it using the shortcut.
- Click Create in the initial panel of the configuration wizard.
- In the Initial Administrator Account panel, specify credentials for the initial administrator's account. This account will be used to sign in to your ArcGIS Enterprise deployment for the first time and for initial administrative tasks such as creating additional accounts. This account applies to both the server and portal components. Click Next.
- In the Additional Account Information panel, enter additional initial administrator account information, and click Next.
- In the Root Content Directory panel, specify a location for the content directory to store logs and configuration files. The default location is /home/linux/arcgis.
Note:
Note that additional system directories will be created outside of the Root Content Directory you specify.
- In the Web Adaptor URLs panel, enter the URLs for the Web Adaptors (https://webadaptorhost.domain.com/webadaptorname) that will be configured with the portal and server components of your deployment. These Web Adaptors must already be installed and located on the same machine where you ran the ArcGIS Enterprise Builder.
- In the Configuration Summary panel, verify the initial administrator account, content directory location and Web Adaptor URLs. Click Finish.
Once configuration begins, you will see a set of configuration steps accompanied by a progress indicator that shows a green check mark upon completion.
Note:
During Step 3 of the configuration wizard to Create the GIS Server site, if you receive an error message indicating the ArcGIS Server site creation has failed, refer to the logs in the /home/linux/arcgis/server/usr folder for more details.
When the components are fully configured, you will see an ArcGIS Enterprise Configuration Status panel indicating that all components have been successfully configured.
Configured components
After completion of the ArcGIS Enterprise configuration wizard, you have the following:
- A portal and ArcGIS Server site configured with the same initial administrator's account
- An ArcGIS Server site licensed as a GIS Server
- Relational and tile cache data stores registered with the ArcGIS Server site
The GIS Server site is federated with the portal and the GIS Server site is set as the portal's hosting server.

Using the links provided in the configuration summary, you can begin to customize your portal, add members and content, and configure security. Additionally, use Server Manager to manage published services.