Export as a template
In this topic
Web AppBuilder enables you to easily create custom web app template for your organization by exporting the app. Your custom template is hosted by ArcGIS Online or Portal for ArcGIS.
Caution:
From this release, you can only export one template from an app. If you want to export more than one template from an app, make copies of the app and export templates from them.
Export the template
Start with the app configured in Web AppBuilder:
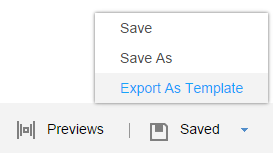
- Click the Saved drop-down arrow and click Export As Template.

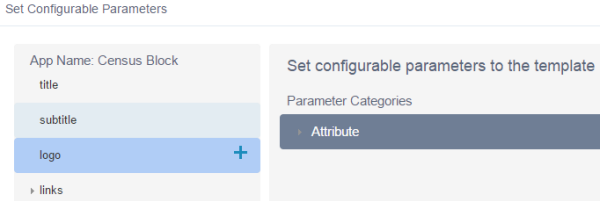
- On the left panel of the Set Configurable Parameters window, select the customizable parameters, for example, logo and click the
 icon in line with the parameter. The logo parameter is added in the right panel of the window.
Configurable parameters such as title and subtitle are added by default; therefore, there is no
 icon associated with them.
 - Expand other parameters, for example widgetPool, to add more configurable parameters.

For more information about configurable parameters, refer to Add configurable parameters to templates.
Currently, the template exported from Web AppBuilder only supports Paragraph, String, Boolean, Number, and Options field types.
- Click Save to save the configurable parameters in the app.
The saved configurable parameters reload when the Set Configurable Parameters window opens the next time. They are persisted in the app config file.
- Click Export. In the Export as Web App Template window, provide the template information with the Title, Tags, and Description. Click OK.
- Depending on whether you have permission to share your exported template to the template group specified in your organization, you may get one of these messages.
- If you do, the message is:

- If you don't, the message is:

- If you do, the message is:
- Click OK. In either case, your template is added as an item in My Content. Navigate to My Content to see your custom template.
The Export As Template will not only create a template as an app item under your account, but also tries to share it with the Web App Templates group specified in your organization. If you do not have privileges to share the item with the specified group, a warning message displays.
- Since the template exported successfully, the Update button replaces the Export button on the Set Configurable Parameters window. Click Update if you make changes on the exported template. Click Cancel to close the window.
- Share the item to the group being used for the templates, if you want to use the configurable template in your organization's web template gallery or group template gallery. The administrator of your organization can then configure the map viewer or configure groups to use the group that includes your template.
- Publish a map with your template.
Refer to Create apps from maps for details.
Update the template
As one app is only associated with one template, update the template accordingly when the app changes.
- Select the app associated with the template in My Content and click Edit Application to open the app.
- Click Export as Template to open the Set Configurable Parameters window.
If you previously exported a template, the Update button shows instead of the Export button.
- Make changes to the parameters.
- Click Update. The Update Web App Template message appears informing you of the update status.

- Click OK to close the message.
- Click Cancel to close the window.
- Publish a map with your updated template.