
1 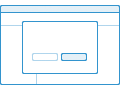 Create new app
Access Web AppBuilder from the map viewer, Gallery, or My Content.
- Open the map viewer, click Share and click Make a Web Mapping Application. Click Web AppBuilder.
- You can also start from the Esri Featured Content > Apps section of the Gallery and choose App Builders.
- From My Content > Create> Apps, choose Using the Web AppBuilder. By default the 2D option is checked. If you want to build a 3D app, check the 3D option.
2 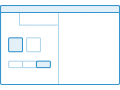 Pick style
Configure the look-and-feel of the app by picking a theme. A theme includes a collection of panels, styles, layouts, and pre-configured widgets.
3 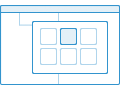 Select map or scene
Select a map or a scene you've created or choose one from your own organization. If you open the Web AppBuilder from the map viewer, you will already have a map selected but you can change it.
4  Add widgets
Widgets give your app functionality, such as print and overview map. Each theme has its own preconfigured set of widgets and you can add additional ones.
5  Configure attributes
Attributes allow you to customize your app banner with a logo, title, hyperlinks and so on.
6  Preview and launch
Preview the responsive app with popular device screen sizes (2D apps only). When ready, save and launch.