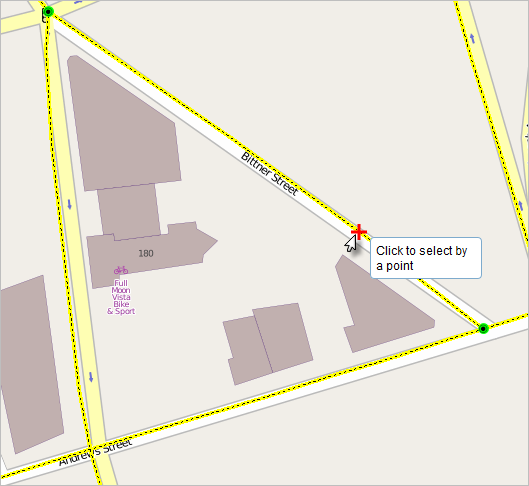
Beim Fangen können Sie Features erstellen, die miteinander verbunden sind, damit Sie Änderungen genauer und mit weniger Fehlern vornehmen können. Wenn die Fangfunktion aktiviert ist, springt der Mauszeiger automatisch an die Position von Kanten, Stützpunkten und anderen geometrischen Elementen in seiner Nähe bzw. innerhalb eines bestimmten Toleranzbereichs. Dadurch ist es möglich, ein Feature mühelos im Bezug zu den Positionen anderer Features zu positionieren.
The Event Editor provides the functionality of snapping to the line, point, and polygon features in the map. Snapping can be useful for the selection of routes, adding line and point events, and creating redlines.
- Öffnen Sie Event Editor, und melden Sie sich beim Enterprise-Portal oder ArcGIS Online an, wenn Sie dazu aufgefordert werden.
- Klicken Sie auf die Registerkarte Bearbeiten.
- In the Edit Events group, click the Snapping Options button
 .
.The Snapping Options dialog box appears.
- Enter the snapping tolerance.
The default snapping tolerance is set to 15 pixels.
Die Fangtoleranz ist die Entfernung, innerhalb derer der Zeiger oder ein Feature an einer anderen Position gefangen wird. Wenn ein Element, z. B. ein Stützpunkt oder eine Kante, innerhalb der festgelegten Entfernung liegt, springt der Zeiger automatisch an die Position. Sie legen den Standardfangtoleranzwert in Pixel fest.
- Choose one of the layers to snap to from the list of layers available on the map.
Hinweis:
You can configure Event Editor to support snapping to more than one layer. If your instance supports snapping to more than one layer, check the box next to each layer to which you want to snap. Enabling snapping on multiple layers can impact the performance of your Event Editor instance. - Check one or more snap types from vertex, edge, and end snap types.
- Vertex snapping—The input will be snapped to feature vertices.
- Edge snapping—The input will be snapped to feature edges.
- End Snapping—The input will be snapped to feature end points.
- Click OK.
The snapping options are now set up.
- To start snapping, click the Enable Snapping button
 .
.Now, when you move your pointer around the map while using a tool, such as selection of routes, adding line and point events, creating redlines, and so on, the pointer will snap to various geometric locations (shown with a red cross) as you move over them.
