Customize the Look and Feel of User-Interface
An easy way to customize your Geoportal is to change its text, graphics, and color scheme. Instructions are in the sections below:
- Customize the Geoportal interface text
- Change the default color theme to another pre-defined one
- Create a custom theme
- Switch the default favicon
Customize the Geoportal interface text
Most of the text for the Geoportal interface is managed in the gpt.properties file in the \\geoportal\WEB-INF\classes\gpt\resources folder. The text seen on the interface is associated with a unique identifying 'bean', which maps it to text in the gpt.properties file. It is important to review the text in the gpt.properties file and update it according to your organization's Geoportal implementation. To find out what text in the interface is mapped to what text string in the gpt.properties file, do the following:
- In a text editor, open the body.jsp file associated with the web page that you want to change. These files are stored in the \\geoportal\catalog\content folder. In this example, we will open the aboutBody.jsp file and alter text on the About page.
- Notice where the bean text is located. It is often indicated by a preceding 'value="#{gptMsg' string. In our aboutBody.jsp file, there are two beans referenced. In this example, the second one will be updated. This bean, catalog.content.about.statement,contains text that will display on the About page describing your organization's Geoportal implementation.
- Navigate to the \\geoportal\WEB-INF\classes\gpt\resources folder and open the gpt.properties file in a text editor.
- Search for the catalog.content.about.statementbean. You should see an entry like the following:
catalog.content.about.statement = \
<p>\
customize this text to describe your organization's Geoportal implementation
</p>
- Change the text after the = sign to include appropriate text for your organization's Geoportal.
- Save the gpt.properties file.
- Refresh the web page, click on the About link at the top, and see that the page has been updated. If other jsp pages referenced the catalog.content.about.statement bean, those pages would be updated with your new text in the Geoportal interface as well. The bean references are useful for quickly updating text used throughout the Geoportal interface.
- Verify that you have updated text associated with the Privacy, and Disclaimer pages. These pages are easy to overlook.
Note:
You will notice that all beans in the gpt.properties file begin with the word 'catalog'. If you add new beans to the gpt.properties file, make sure that they too are prefixed with 'catalog'; if they are not, then the bean's associated text string will not display in the geoportal interface.
Change the default color theme to another pre-defined one
The \\geoportal\catalog\skins\themes directory contains 2 sub-folders: blue and red. The active color theme is referenced in the \\geoportal\catalog\skins\lookAndFeel.jsp file. By default, the active theme is the red theme. The simplest customization is to change from one pre-defined color theme to another - for example, from the red theme to the blue one.
- Navigate to the \\geoportal\catalog\skinsfolder.
- Open the lookAndFeel.jsp file in a text editor.
- Notice there are three <link rel="stylesheet"
…> tags.
- The first (...\tundra.css) defines the stylesheet reference for the Browse tab and some other functionalities within the geoportal web application. There is no need to alter this \tundra.css location
- The second <link rel="stylesheet" …> tag sets the location of the main.css, which defines the color scheme for the geoportal interface.
- The third <link rel="stylesheet" …> tag sets the location of the preview.css, defining the color scheme for the Preview functionality.
- By default, the main and preview stylesheets are set
to reference stylesheets in the red theme folder. When you change
these to reference the blue folder, the Geoportal interface and
Preview function will be displayed according to styles in the
blue theme folder. Change these references to point to the blue folder, as shown
below:
<link rel="stylesheet" type="text/css"
href="<%=request.getContextPath()%>/catalog/skins/themes/blue/main.css"/>

<link rel="stylesheet" type="text/css"
href="<%=request.getContextPath()%>/catalog/skins/themes/blue/preview.css"/>
- Save the lookAndFeel.jsp file.
- Restart the geoportal web application for your changes to take effect.
Create a custom theme
The simplest way to create your own color theme is to use one of the pre-defined themes as a base and edit it. Make a copy of one of the pre-defined themes that are available out-of-the-box and modify its images and class definitions, as described in the steps below.
- Navigate to the \\geoportal\catalog\skins\themesfolder.
- Copy the red folder into the same directory, giving it a new name (e.g., "green")
- In your newly named folder, open the main.css file and modify it to define new styling
- Open the preview.css and modify it as well to define styling. This preview.css file defines styles for the geoportal live services previewing page.
- Open the images directory in your new folder, and replace any of the images with your own.
Tip:
To change the banner, you can do either of the following:
- Name your banner image 'banner.jpg', and copy it into this image folder, thus overwriting the default banner.jpg file.
- If your banner image has a different name, you can find the reference to the banner.jpg file in the main.css file, and change it to match the name of your banner image.
- Follow the steps in the Change the default color theme to another pre-defined one topic above to reference your new theme in the lookAndFeel.jsp file.
Switch the default favicon
A favicon allows users to quickly distinguish the geoportal web page from other webpages in a list of favorites or tabs they may have open in a browser. Most web browsers will use a favicon, and where it is displayed may vary depending on the browser.
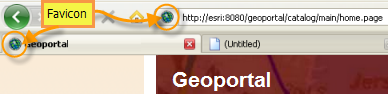
By default, the geoportal uses a favicon that looks like the ESRI globe logo. Likely, your organization will want to implement its own favicon. The steps to switch the favicon to one that better suits your organization are described below.
- Navigate to the \\geoportal\catalog\skins directory and open the lookAndFeel.jsp in a text editor.
- There are two parameters that define the favicon in
this file, both shown below. You do not need to alter these lines,
but do note that the geoportal is looking for a favicon called
favicon.ico. If your new favicon image has a different name, you
can either change the name of your image to favicon.ico, or alter
the lookAndFeel.jsp with the name of your image.
<link rel="icon" type="image/x-icon"   href="<%=request.getContextPath()%>/catalog/images/favicon.ico" />
<link rel="shortcut icon" type="image/x-icon" href="<%=request.getContextPath()%>/catalog/images/favicon.ico" />
- Navigate to the \\geoportal\catalog\imagesfolder.
- Replace the favicon.ico file in this folder with your image.
- Restart your geoportal web application.
- Most browsers keep favicons in a cache. Users will have to clear their browser cache to see the new favicon.